The cake I based this
on started with an 8" square pan, cut into quarters. I used a 12" pan. So these
are 6" across, instead of 4". This may have contributed to the scary, out of
control, aspect of creating this cake.
The cake I based this
on started with an 8" square pan, cut into quarters. I used a 12" pan. So these
are 6" across, instead of 4". This may have contributed to the scary, out of
control, aspect of creating this cake.
Then again, it might just be because the author of the original creation used
plastic instead of fondant. We'll never know ;)

 I
took a 6" cardboard as a template to create four 6" circles.
I
took a 6" cardboard as a template to create four 6" circles.

All four layers, sandwiched with buttercream frosting.
 At this point, we
started worrying about stability, transport, etc. Aidon had the bright idea that
maybe something should be put through the cakes, to give support. We had some
straws, and used those. I chose bright pink so they'd be obvious if somehow they
were in a piece of cake.
At this point, we
started worrying about stability, transport, etc. Aidon had the bright idea that
maybe something should be put through the cakes, to give support. We had some
straws, and used those. I chose bright pink so they'd be obvious if somehow they
were in a piece of cake.

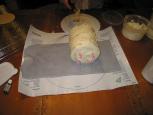
The whole cake, buttercream coated.
This is now awaiting a very scary and dangerous maneuver. I think the author of
the original idea for this cake is a complete sadist! I'm just saying! (I
actually think very highly of her creations - I just pale in comparison,
execution-wise!)

 Black
and blue colored fondant. My hands, not surprisingly, were ... well ... black
and blue!
Black
and blue colored fondant. My hands, not surprisingly, were ... well ... black
and blue!
Mixing together the black, blue, and white fondant to create stone color!
Voila! Black, blue, and white made a pleasing grey stone color.


 I
had to use the very largest mat I had to roll out the side of the cake. with a
6" diameter, I was approaching a 19" circumference.
I
had to use the very largest mat I had to roll out the side of the cake. with a
6" diameter, I was approaching a 19" circumference.
The cake was 6.5" tall, and I intended to flap some triangles over the top to
help support the sides. So I needed approximately 9.5" x 19".
 This was
the absolutely most horrifyingly scary part of any cake making EVER!
This was
the absolutely most horrifyingly scary part of any cake making EVER!
 Aidon and I just gritted
our teeth and plowed forward, but I swear, this was just an INSANE maneuver. If
the book I got this idea out of didn't make this part look like a walk in the
park, I'd have come up with something else! (Seriously - she made it look like
EVERYONE takes a sticky buttercream frosted cylinder, made of four separate
cakes and rolls stretchy fondant around it ... all the time!)
Aidon and I just gritted
our teeth and plowed forward, but I swear, this was just an INSANE maneuver. If
the book I got this idea out of didn't make this part look like a walk in the
park, I'd have come up with something else! (Seriously - she made it look like
EVERYONE takes a sticky buttercream frosted cylinder, made of four separate
cakes and rolls stretchy fondant around it ... all the time!)
There are no further pictures of how we got this thing rolled up because it took
all four of our hands, and both brains to do it. It was a mess, it was unwieldy,
and it was just horrifying.
If I ever make a cake like this again, without some major adjustments in
technique or fondant-type, I think Aidon will kill me.
We got it wrapped. Sort of. More or less.
 We put it in the fridge
with the hope that that would help firm up the buttercream underneath, and
adhere the fondant to it.
We put it in the fridge
with the hope that that would help firm up the buttercream underneath, and
adhere the fondant to it.
The author of this cake idea is a complete sadist. Or she wrapped HER cake in
plastic, or something. Hers looks fantastic at this point.
It's a good thing I was GOING for a dilapidated castle for bats ... the sagging
that ensued worked well with that!

The very top of the castle, all rolled out.
 A bunch of fondant
"rocks" ... rocks are easy and fun to make! And popular, too! "I want a rock!"
was a commonly heard refrain, at the party!
A bunch of fondant
"rocks" ... rocks are easy and fun to make! And popular, too! "I want a rock!"
was a commonly heard refrain, at the party!
 The original design had
a pretty little fondant cutout for the top rim of the castle. HAHAHAHAHA! That
would work if you had plastic-fondant, but not my soft stuff. So I decided to
make it out of rocks, which fit the dilapidated look, anyway.
The original design had
a pretty little fondant cutout for the top rim of the castle. HAHAHAHAHA! That
would work if you had plastic-fondant, but not my soft stuff. So I decided to
make it out of rocks, which fit the dilapidated look, anyway.
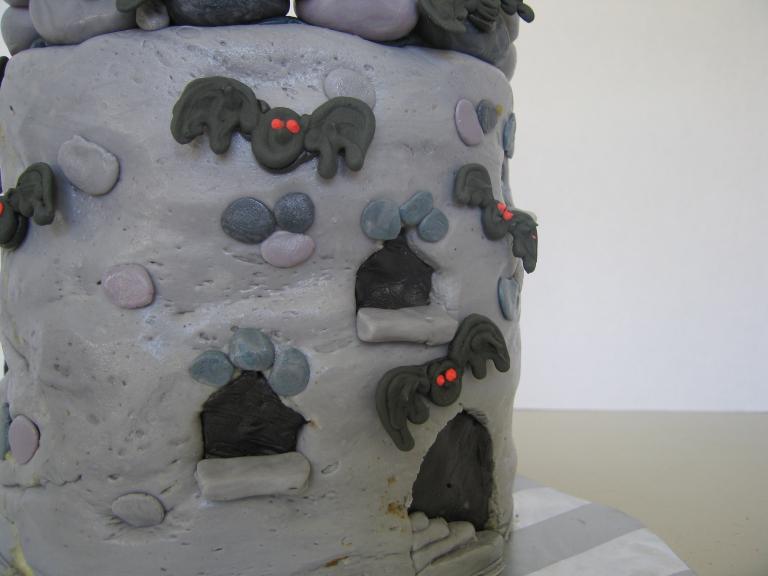
I love how "rocky" a lot of the rocks came out!

 Rocks on the castle!
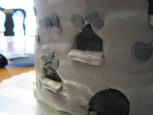
I cut out the windows with a tiny square cutter.


After cutting out the windows, I made a very thin bit of dark fondant to press into the window hole.

I cut out a hole for the door, put in the dark fondant, and put in graduated steps. I love how those came out.

I smushed some tiny rocks to place around the turret.

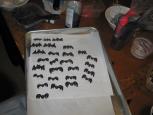
 The
last thing to do before bed - make royal icing decorations to dry over night!
The
last thing to do before bed - make royal icing decorations to dry over night!
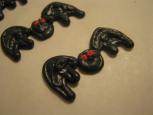
BATS!
It turns out that the round-bodied ones, with the curved-on-top wings were a lot
easier to pipe, and also sturdier when removing the following day.

Oh yeah - the VERY last thing we did was truss up the cake so it wouldn't sag
any more. I didn't get a picture of it until morning, though.
I think it helped.


A picture of
the turret after adding the window ledges.
These were done in the morning because of the trussing.
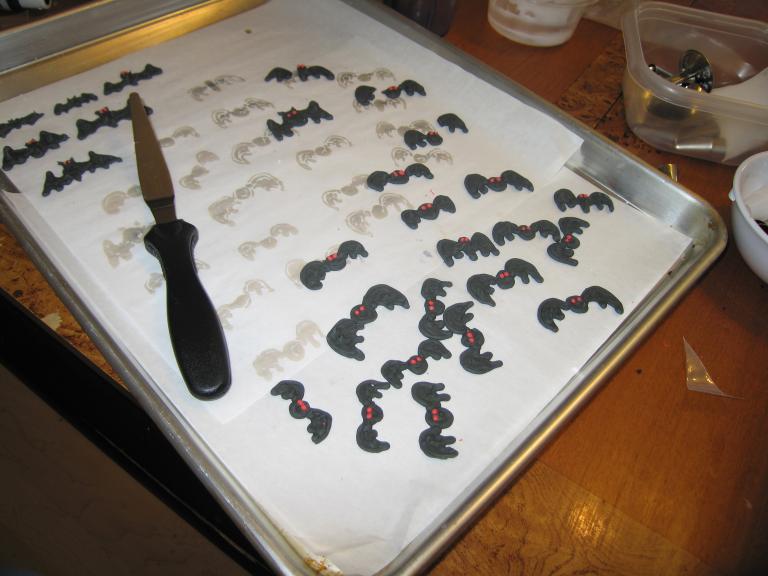
 Bats on the move! Only a
few broke...
Bats on the move! Only a
few broke...
Poor broken bats!

The cake, in all its glory, while still on the kitchen table/my work area.
Some of the many pics of the final version of the cake.
I recently got a white presentation-board for putting in the background of cake
pics. I think it does help to see what the cakes look like without the
background clutter of a household in use. (And boy, is my household in USE!)