Kimberly's Kakes
Seasons Wedding
![]()
![]()
![]()
|
Kimberly's Kakes
Seasons Wedding
|
|
When my friends Mary and Casey decided to celebrate their tenth anniversary by getting married, I was more than honored to be asked if I was interested in doing their wedding cake. They gave me complete free reign on design, and flavors, too. Mary likes surprises! I actually had a cake that I had seen a while ago, on the net, that was right up their alley, theme-wise. I was aiming a lot lower, but I wanted to represent all four seasons in a cake for them. This was the first really major cake undertaking I had done, and I severely underestimated the time it would take. By 4am the night before the wedding, I started a triage to figure out what I could do to make sure that the four seasons were represented on each cake - without doing a whole lot more than I already had! Most of the photos on this page were taken by me, but some of the truly spectacular pictures of the final cake were taken by others. Many thanks to **find out who the pics are from** for allowing the inclusion of their pictures in this page! **get menu picture **get photo credits and links to flickr
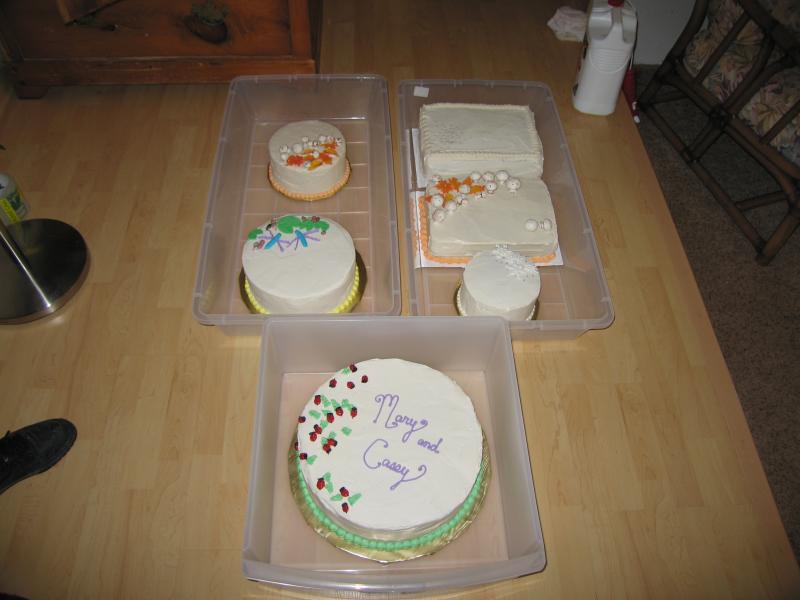
I had not intended for the auxiliary cakes to be on display - so I didn't really worry about how they looked compared to the main cakes. It turned out there was really only one place for the cakes, so they were placed with the main cake. It's a good thing I put at least SOME decoration on them, even if they were a bit messy.
The bottom tier was Summer. This was a 14" chocolate cake with vanilla-mint buttercream frosting and mint-oreo buttercream filling. It was decorated with royal icing ladybugs and buttercream vines, and highlighted with a green accent border.
The next tier was Spring. This was a 12" lemon cake with lemon buttercream frosting and lemon curd filling. It was decorated with green fondant lily pads, chocolate rocks, and buttercream dragonflies. It was highlighted with a yellow accent border.
The next tier was Autumn, with its orange accent border. The cake was a warm spice cake with cream cheese frosting and filling. It was decorated with meringue mushrooms that looked so realistic, the little girl who normally eats meringue cookies until she's stopped wouldn't TOUCH them! It also had fondant autumn-colored leaves. It is my understanding that this is the cake that made it into the freezer for their first anniversary (since there was a large auxilliary cake to eat, instead.)
The final tier was, of course, Winter. It was vanilla cake with rasberry buttercream, raspberries, and wrapped in home made marzipan. Winter was decorated with royal icing snowflakes, and silver (banned in California!) dragees, and had a white accent border.
This many cakes requires a LOT of eggs! Our chickens were not yet quite up to the task of supplying me with enough for such an endeavor, so I bought two flats of eggs, totaling 60 eggs. That's what was left. I think I ended up using that one, too, later!
Fortunately, we can recycle eggshells - the chickens love them, and it gives them the calcium they need for producing strong eggshells. Very little organic waste gets thrown out in our kitchen - most everything either goes into the stock bucket in the freezer, or into the chicken bucket, and eventually the chickens!
The chocolate cake was BIG! It really filled up my oven! You can see the parchment paper peeking over the sides. I'm not sure why I didn't form-fit it to the bottom like I usually do. Probably laziness. It worked, anyway!
We had to pull out one of our larger, portable Costco tables just to hold all of the cake! That's a LOT of cake! Please note above re: overdoing it. Completely. And that's not even all of the cake!
I had to make a LOT of buttercream frosting. This was just one of MANY double batches of frosting I made.
Any time I fill a cake with something squidgy, I put a dam of icing to keep it in the middle. Lemon curd is decidely squidgy! Tall cakes really look good, even when just crumb coated, I think!
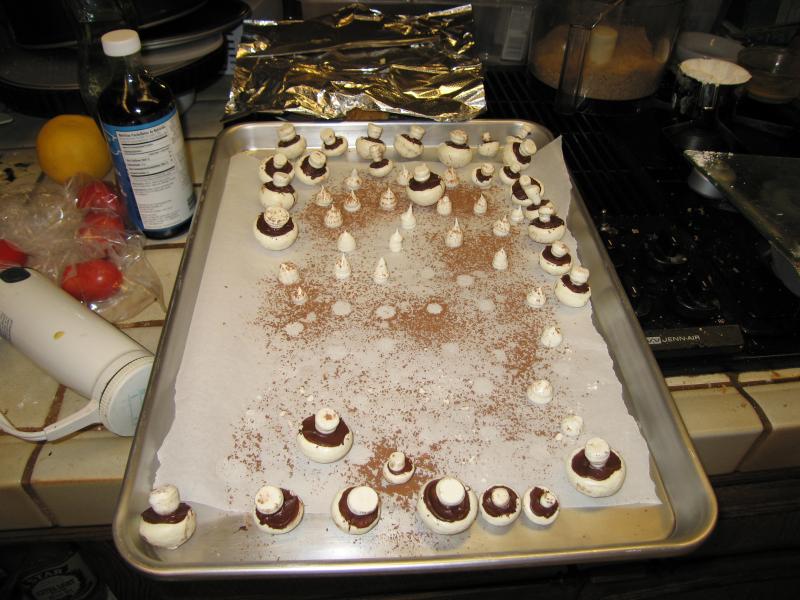
I filled the spice cakes with a lot of yummy cream cheese frosting.
Then I piped out the "stems" with a smaller round-holed tip. Finally, I sprinkled a small amount of cocoa over them, before baking, for that dusty, dirty look.
When they were completely cool, I melted a bit of chocolate, and spread that on the underside of the caps, and used that as glue for the stems. I found that poking a small hole in the bottom of the cap for the stems to lodge into helped them stay put. I squeed like a little girl at how cute these were!
  Because
the top tier was going to be covered in marzipan, and then frosted, I didn't
require a true crumb coat - only enough buttercream to help the marzipan to
stick. I learned a lot about marzipan during this project, and certainly would
do a lot of things differently on another cake! Anyway, the cakes still needed
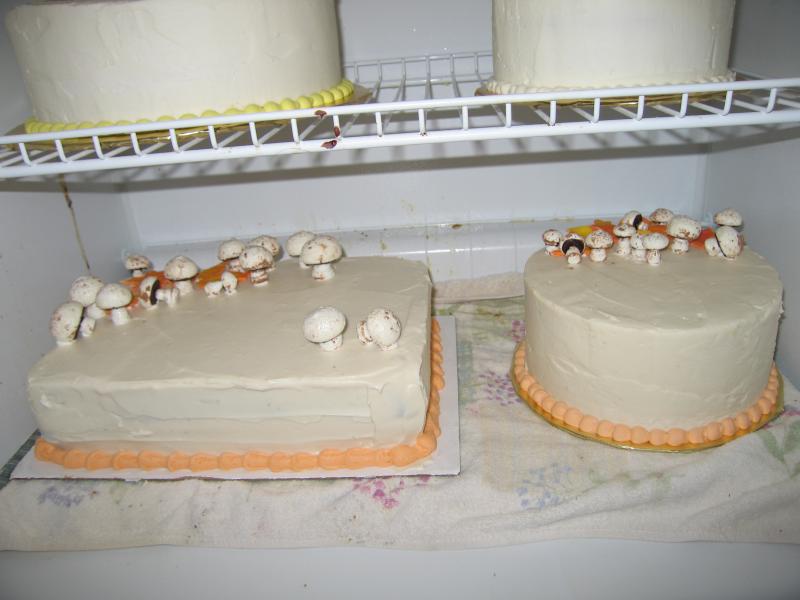
filling and frosting. Raspberries all the way! The fridge is starting to get
FULL! Because
the top tier was going to be covered in marzipan, and then frosted, I didn't
require a true crumb coat - only enough buttercream to help the marzipan to
stick. I learned a lot about marzipan during this project, and certainly would
do a lot of things differently on another cake! Anyway, the cakes still needed
filling and frosting. Raspberries all the way! The fridge is starting to get
FULL!
I've started doing the final coating of icing, and the cakes are starting to look elegant. And the fridges are starting to look FULL!
Ladybugs were a known quantity - I had made them before. The leaves and lily pads were something I hadn't done, but weren't terribly difficult. The worst of it was how tired I was getting at the point at which the leaves were being made.
Click on any photo for a larger image:
|
|
|
Contact:
kimberly@_kimberlyskakes._com Copyright Kimberly Jennery, 2007 |